Smart Ice Maker
Upgrade your ice maker with smart features using an ESP8266. Automate its operation, and get notifications for refilling the water tank. Enjoy cold drinks whenever you need them.

| Skill | Cost | Time |
|---|---|---|
| 2 / 5 | ~5 Euro | ~60min |
Challenge / Annoyance
When I purchased the (Tectake) ice maker, I was excited to enjoy a refreshing cold beverage whenever I wanted. However, I soon became increasingly annoyed with the wait time required before it produced ice. Every time I turned it on, I had to wait a frustratingly long time before enough ice was ready. As a result, I would often forget about it and miss out on the opportunity to have freshly made ice for my drink.

On top of that, the water tank is small and needs frequent refills. This constant depletion of the water supply resulted in a shortage of ice, leaving me high and dry at the most inconvenient times. These challenges made it clear that I needed to find a solution to improve my ice-making experience, which led me to embark on a DIY project to integrate my ice maker with Home Assistant.
Solution
The ice maker's control panel, situated on the front of the machine, is equipped with two buttons. One button powers the device on and off, while the other allows for selecting two ice cube sizes: small and large. However, selecting small ice cubes is commonly disregarded because the "large" ice cubes are not significantly large.
The control panel also boasts five notification LEDs that light up to indicate when the water tank is empty, the ice tray is full, the device is switched on, and whether the small or large ice cube size is selected.
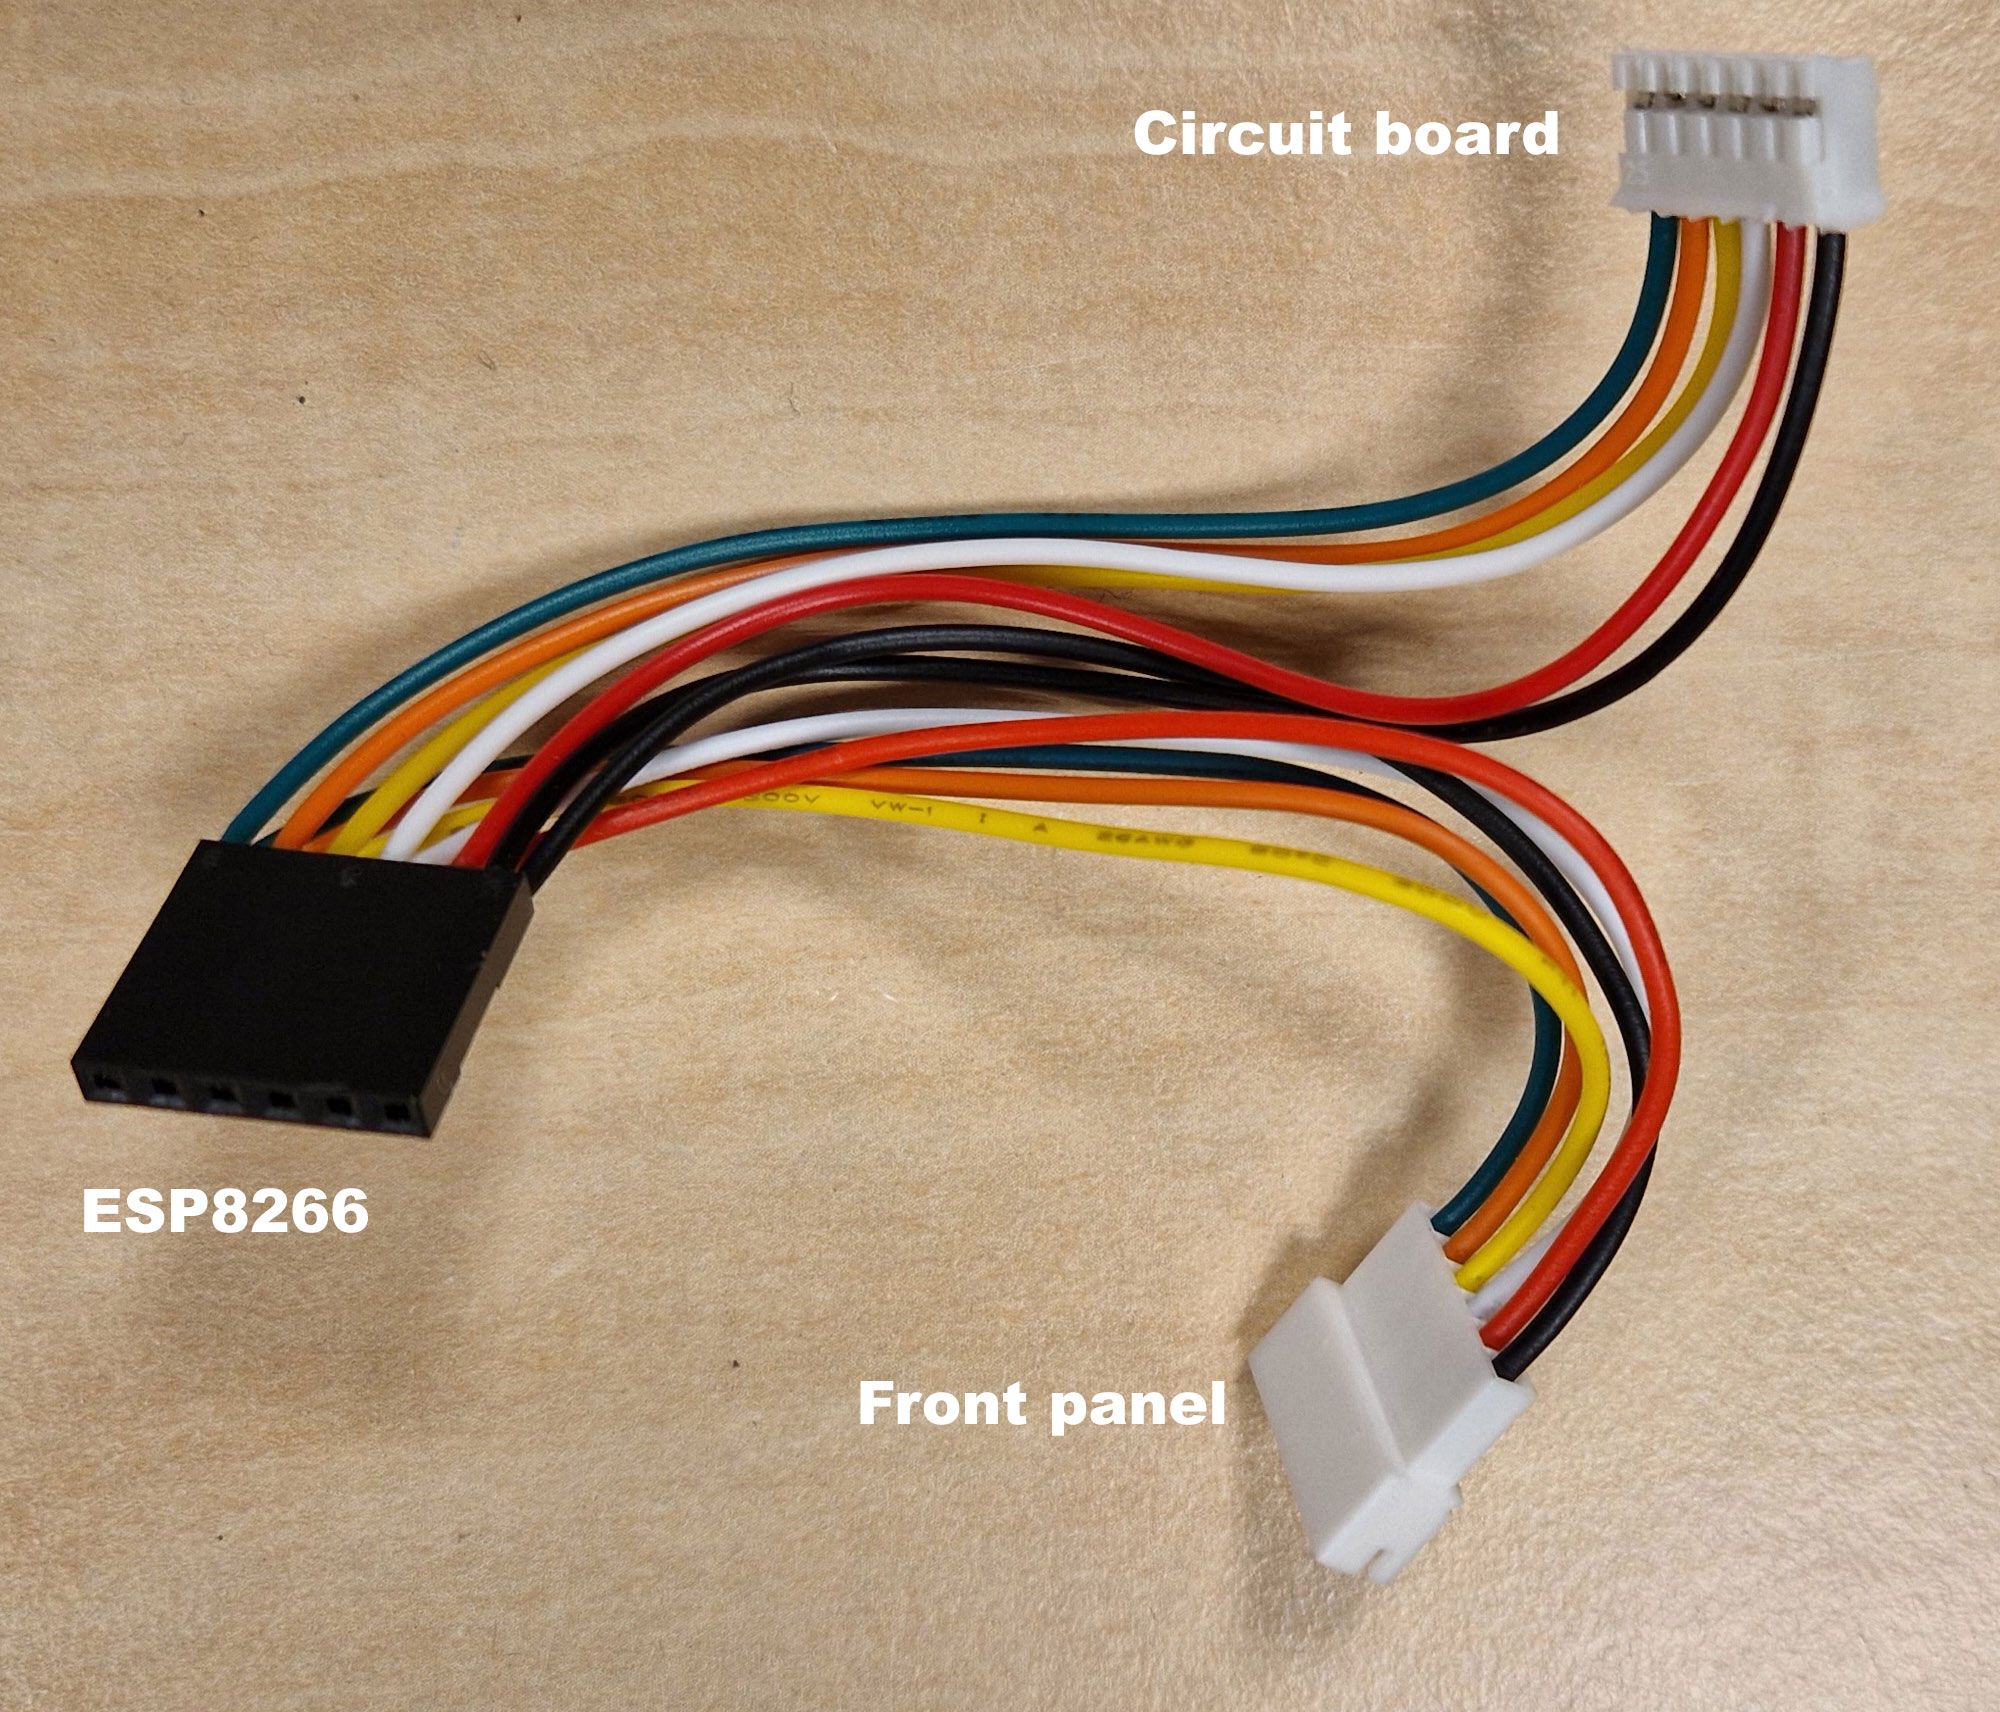
The panel's cable comprises six wires: ground, four signal cables, and a power cable that also registers the power and select buttons. By interpreting the high and low statuses of the four signal cables, we can accurately determine the power status and whether it is full or empty.

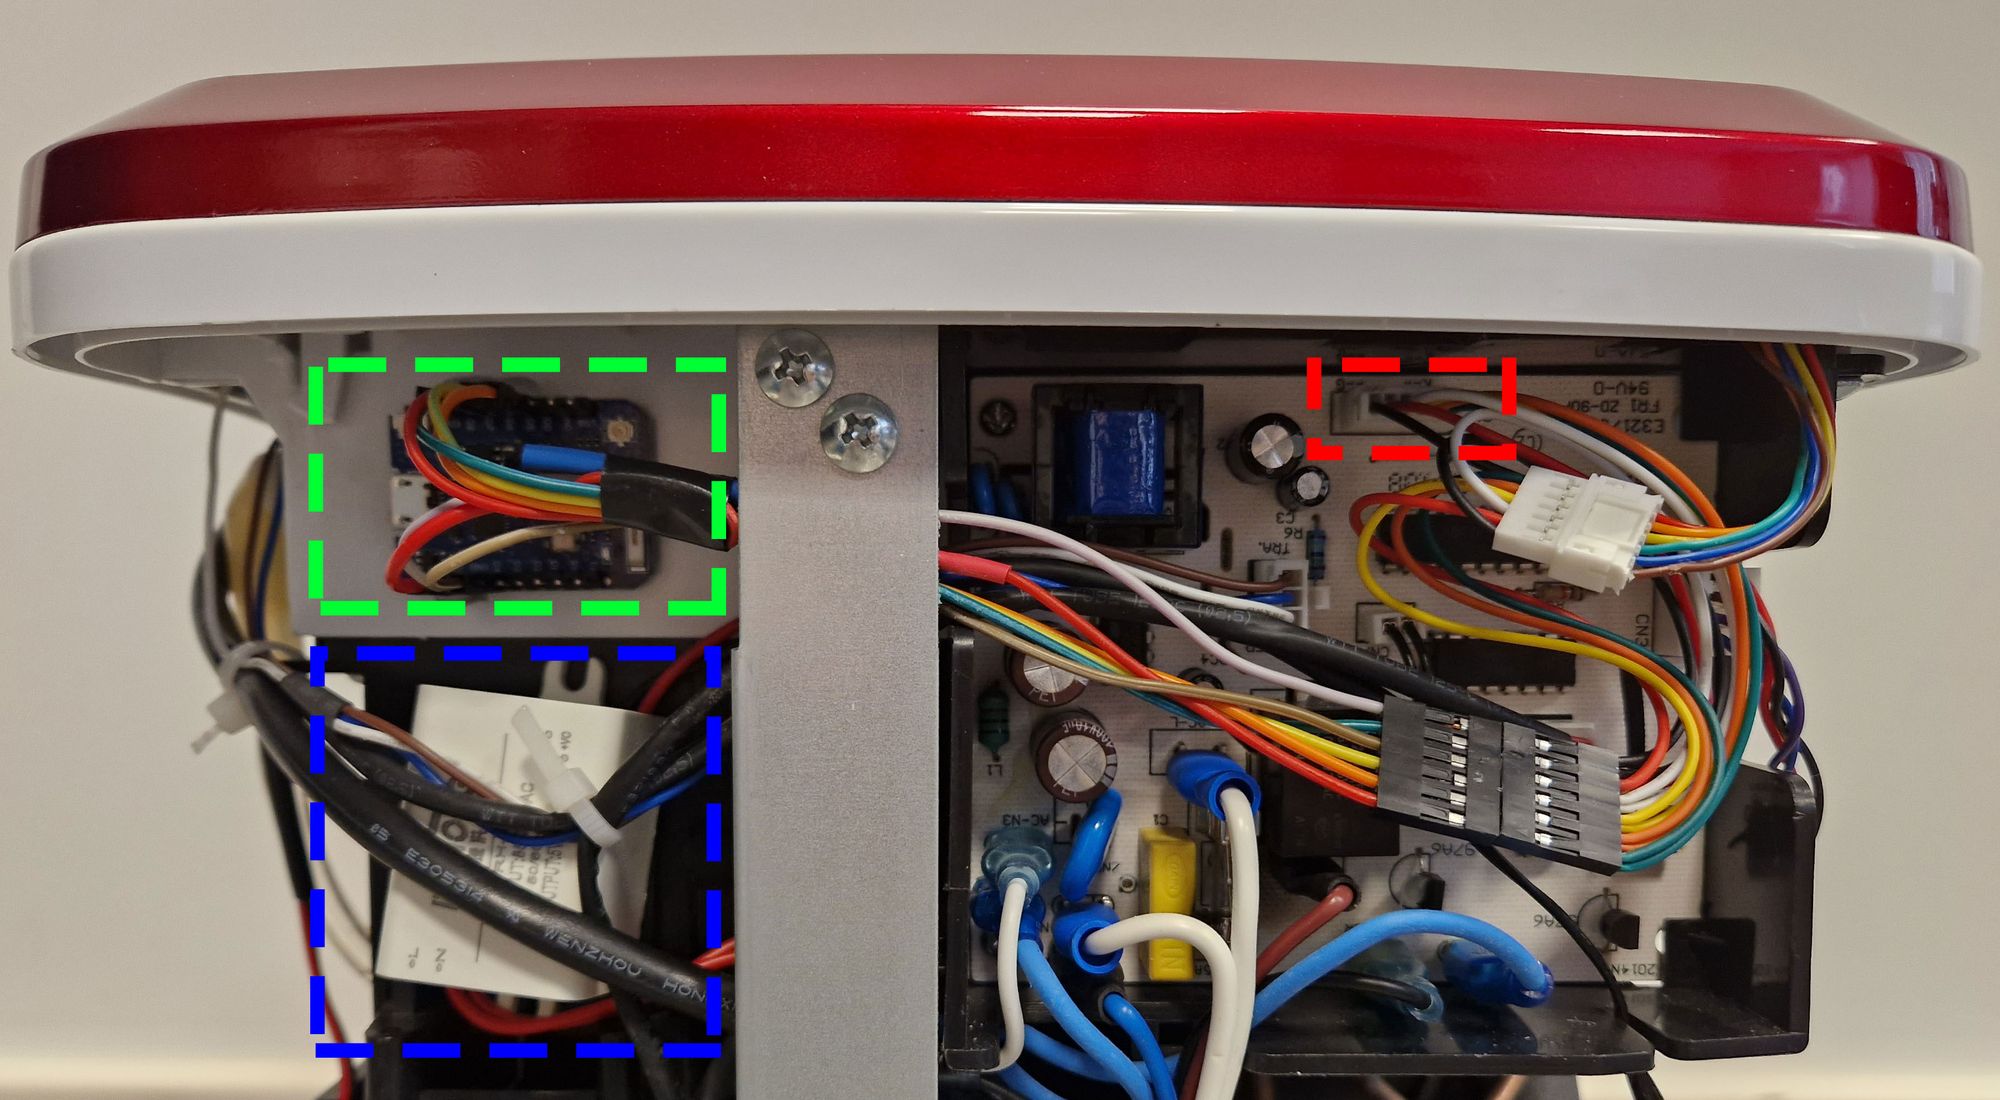
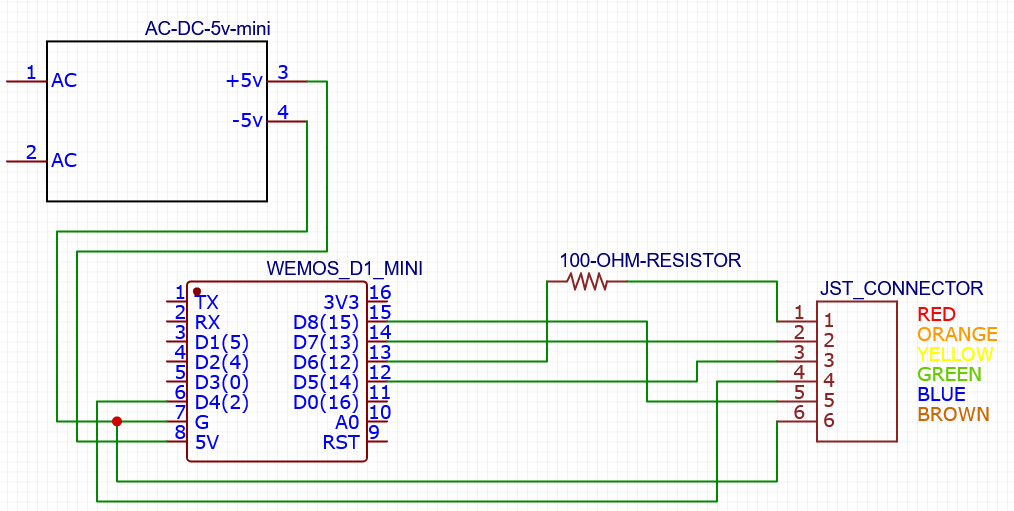
Unfortunately, we couldn't obtain 3.3V or 5V for the ESP8266 (green) directly from the circuit board, so we had to include a power converter (blue) to lower the input voltage from 230V AC to 5V DC.
Code
We have written Arduino code that enables the user to power the ice maker on and off and to monitor its status (empty/full) within Home Assistant, facilitating notifications when the water container requires a refill. This feature provides the user with timely and convenient notifications and ensures that the device always performs optimally.
Result
Our ice maker now operates seamlessly, and we no longer have to worry about having cold beverages ready when needed. Thanks to our implemented upgrades, the device automatically switches on at around 3 pm on warm days, ensuring that ice cubes are available when we require a refreshing drink. In addition, the notifications alert us when it's time to refill the water tank, significantly reducing the waiting time required. Since upgrading the ice maker, we have not had to endure unnecessary delays in quenching our thirst.

Bill of materials
- JST PH 2.0 6p male and female connectors
- Dupont connectors (6p male, 6p female, 4p female and 3p female)
- ESP8266 NodeMCU (Wemos D1-mini)
- 100 Ω resistor
- AC-DC Power Supply Module (In AC 85V-265V, Out DC 5V 600mA)
Off-the-shelf alternatives
Although a limited number of ice makers are available with "smart controls", these options often require cloud connectivity and lack built-in integration with Home Assistant.
Conclusion
In conclusion, our upgraded ice maker has proven to be a reliable and convenient addition to our household. With the help of the ESP8266 and a few other materials, we were able to automate the device and streamline its functionality. In addition, the notifications for refilling the water tank have been beneficial, ensuring we always have ice cubes ready for a refreshing drink. We are pleased with our project's outcome and our ice maker's improved performance.